


Fred's Appliance Academy
October 8, 2020
Range Training
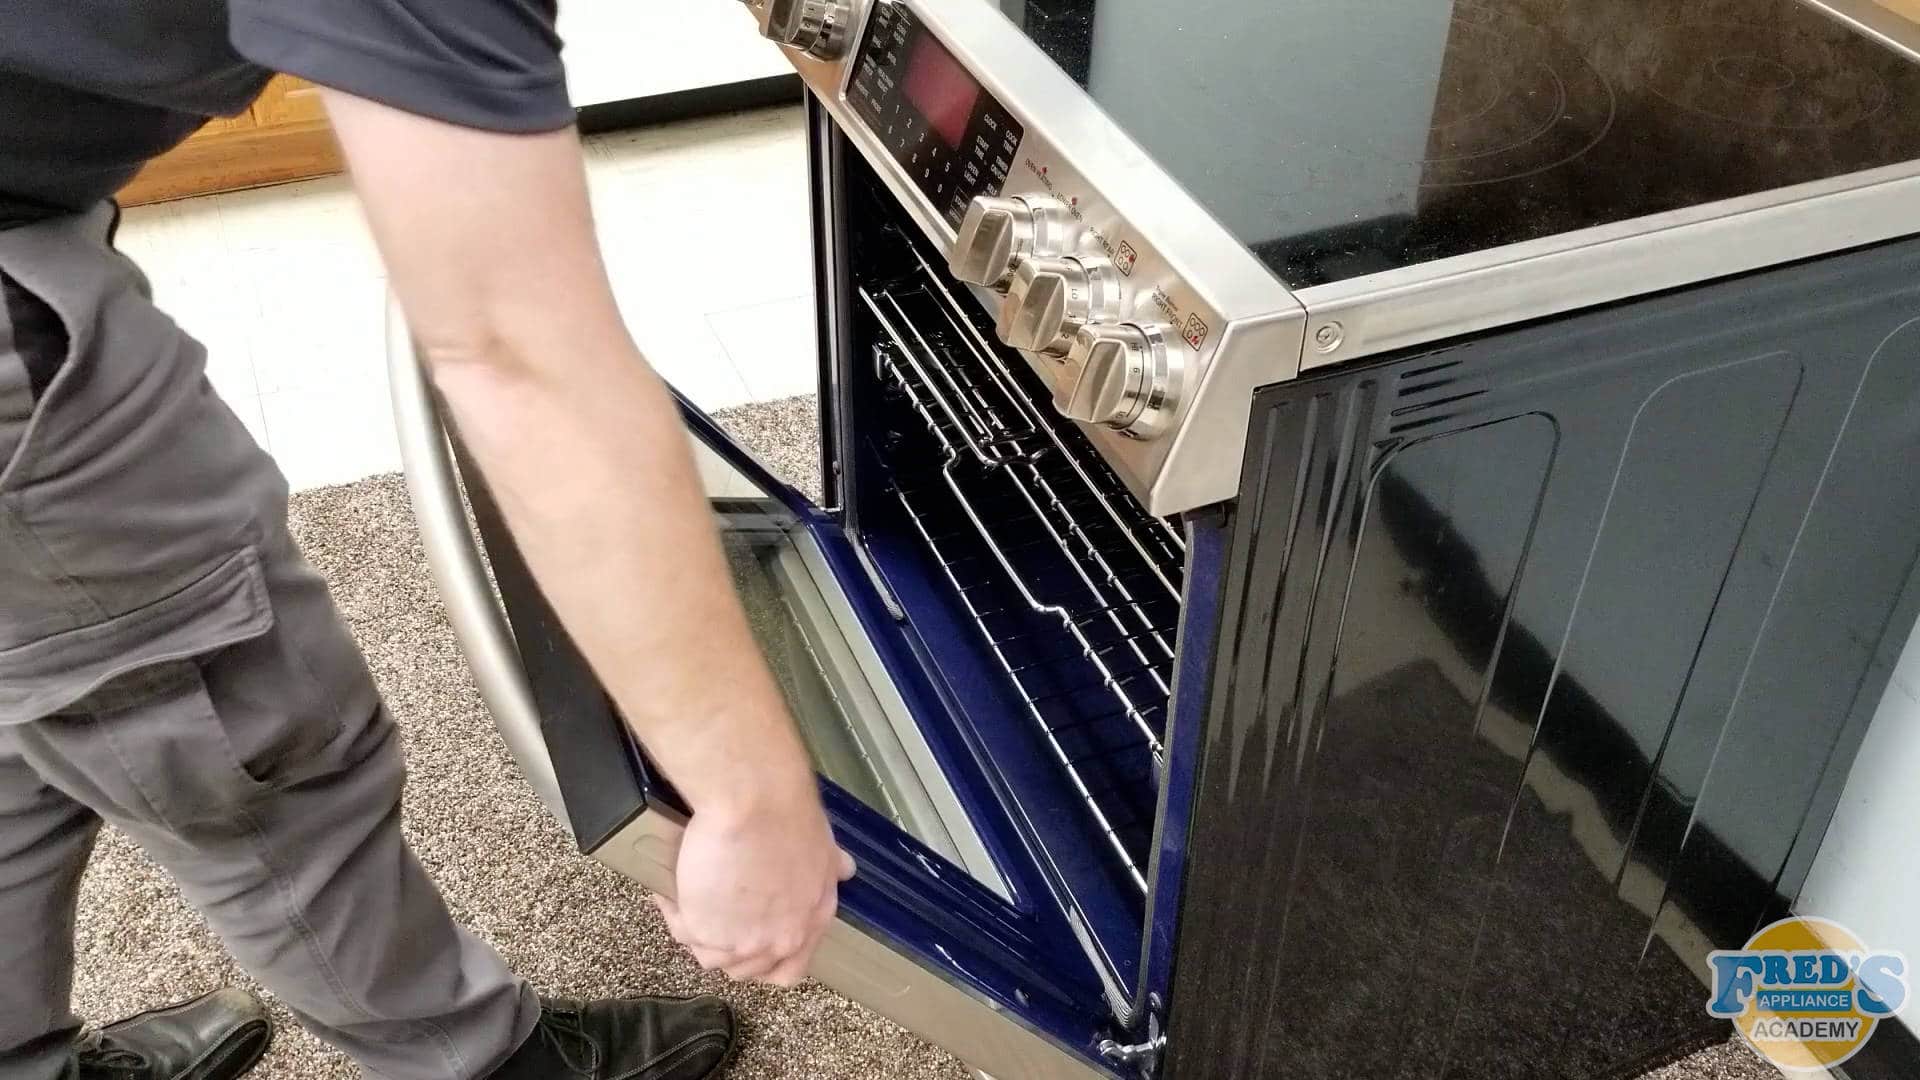
Welcome back to Fred’s Appliance Academy, everybody. And today we’re going to be going over how to clean the glass on your oven door. We’re going to begin by opening up the door to gain access to the hinges so we can release the locks. Use a flathead screwdriver to lift up on the lock. You can do this from the side or the center of the lock. Once the lock is released, simply swivel it towards the door until it won’t move any further.
Next, gently closed the door until it won’t close any further. Here we have the door in the released position and we will simply lift it up and off of the oven. Once the door is released, gently lean it against the oven or set it on a soft surface to prevent damage. Here we have the door with the outer panel facing down and we are going to remove the two Phillips-head screws that are securing the inner panel to the door handle.
Now with the bottom of the door facing upright, we’re going to remove the three Phillips-head screws that are securing the outer panel to the inner panel. Once the three screws are removed, the outer panel and the inner panel can now be separated. Here we can see drip marks on the inside of the outer panel’s glass. This is a result of this outer panel being vented at the top as hot moist air flows through it, moisture accumulates on the glass, and eventually drips down creating these streaks and run marks.
Though it is on appealing to the eye, it is actually quite normal for this to happen on any modern oven. As you can see, we’ve applied some glass cleaner and now we will begin to scrub the glass with a Scotch-Brite pad. The Scotch-Brite pad itself will not scratch or damage the glass and provides a fair amount of abrasiveness to remove most stains. Once you have scrubbed the glass clean, simply wipe it dry with a paper towel or a microfiber towel
Here we have the inner part of the door propped up and we will begin the cleaning process for this. You can see, we also have some drip marks here. Again, we’ll just apply some glass cleaner and use our Scotch-Brite pad to scrub that slightly. Here we’re going to use a flat blade razor to scrape off the drip marks on these panes of glass. The inner panes of glass tend to get a lot hotter than the outer panes do and any debris tends to bake on fairly well. As long as you’re holding the razor flush against the glass, you’re not going to do any damage. It’s going to be the same technique as if you were scraping paint from a window.
Once the glass has been scraped free, simply follow the process used on the outer panels. With the panel flipped around and upside down, we’re now going to remove the four Phillips-head screws that are securing the door hinges in place. Once that process is completed, flip the panel to the upright position and remove the two remaining Phillips-head screws to release the door hinges from the panel.
Just for a visual, I turned the panel back around so you can see the hinges freely being removed.
To gain access to the inner panes of glass, the outer pane and its mounting bracket must be removed. This is simply done by removing all of the exposed Phillips-head screws. Avoid touching the white insulation as it can irritate your skin. The inner panes of glass here are held together with a bracket and typically they are sealed fairly well and the insides don’t need to be cleaned. However, it does lift up and out at this point if you do desire to take it apart and clean the inside of the glass.
The panes are identical in size and they can not go back together in correctly. Follow the previous steps to clean the inner panes of glass. Once the glass is clean, simply install the outer bracket and outer pane of glass. Most makes and models will vary in design on the construction of the door and how the glass is held together. However, most are going to be similar in design.
Install the hinges back onto the door. Once in place, flip the panel around and reinstall the two Phillips-head screws that are securing them to the inner panel. Flip the door panel back to being upside down and reinstall the four Phillips-head screws that are securing the door hinges to the bottom of the panel.
Slide the outer door panel back onto the inner door panel and re-install the three Phillips-head screws that are holding the bottom together. With the door now flipped around, re-install the Phillips-head screws that are securing the inner door panel to the door handle. With the door now reassembled, simply lift it up and hang it back onto the oven.
Once the door is secured back onto the oven, put it in the downright position and turned the locks back to the closed position.
Cleaning the glass that faces directly to the inside of the oven will be the most difficult as it gets the hottest. However, the cleaning process is the same for all the previous panels.
If you are a service professional, it is always polite to clean the outside of the oven door when your job is completed, especially if the unit is a stainless steel model, as your fingerprints will be left behind. Clean the glass with the same processes before. However, do not use glass cleaner on the stainless steel as adverse effects can occur. Only stainless steel cleaner should be used to clean the stainless steel and the directions on the bottle should be followed.
There are many different brands of stainless steel cleaners on the market and it may take several attempts using different brands to achieve the desired effect. The best cloth to use while cleaning stainless steel would be a microfiber cloth followed by a terrycloth. If these are not available, paper towels can be used.
Again, thank you for joining us here at Fred’s Appliance Academy and we hope you found this video to be informational.
Join the industry's best trainers.

(800) 781-1814Text or ring! ring!
Live ChatClick to say hi

Apr. 05, 2024
How to test a gas range ignitor

Mar. 29, 2024
Congrats to our graduating March 2024 class

Mar. 22, 2024
How to test a 120 volt receptacle

Mar. 01, 2024
Congrats to our graduating February 2024 class

Feb. 05, 2024
Why Is Your Dishwasher Soap Not Dissolving? (5 Easy Fixes)

Feb. 05, 2024
Refrigerator Dripping Water Inside? 5 Quick Fixes

Feb. 02, 2024
Appliance Industry 2023 Q4 Results

Feb. 02, 2024
Congrats to our graduating January 2024 class
Jan. 26, 2024
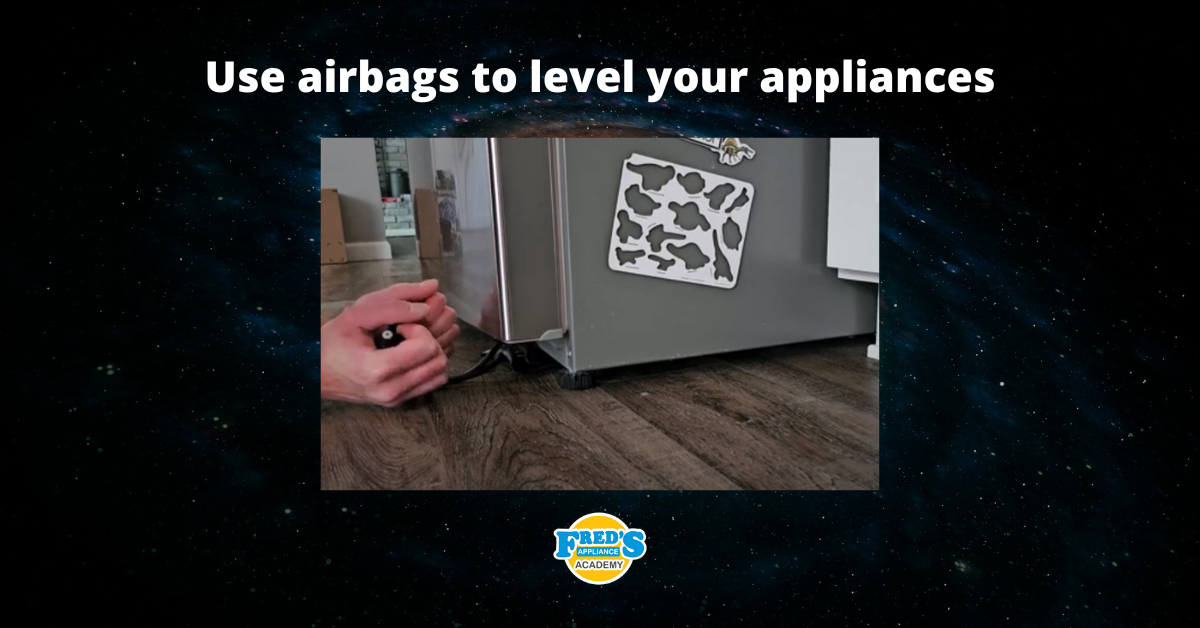
Clever ways to use airbags to level your appliances

Jan. 12, 2024