


Fred's Appliance Academy
July 21, 2023
Microwave Training
Something you may not know is that your modern-day digital meter only outputs around 3 volts DC, which is not enough voltage to push through a microwave high-voltage diode. So how do we test them? Let me show you.
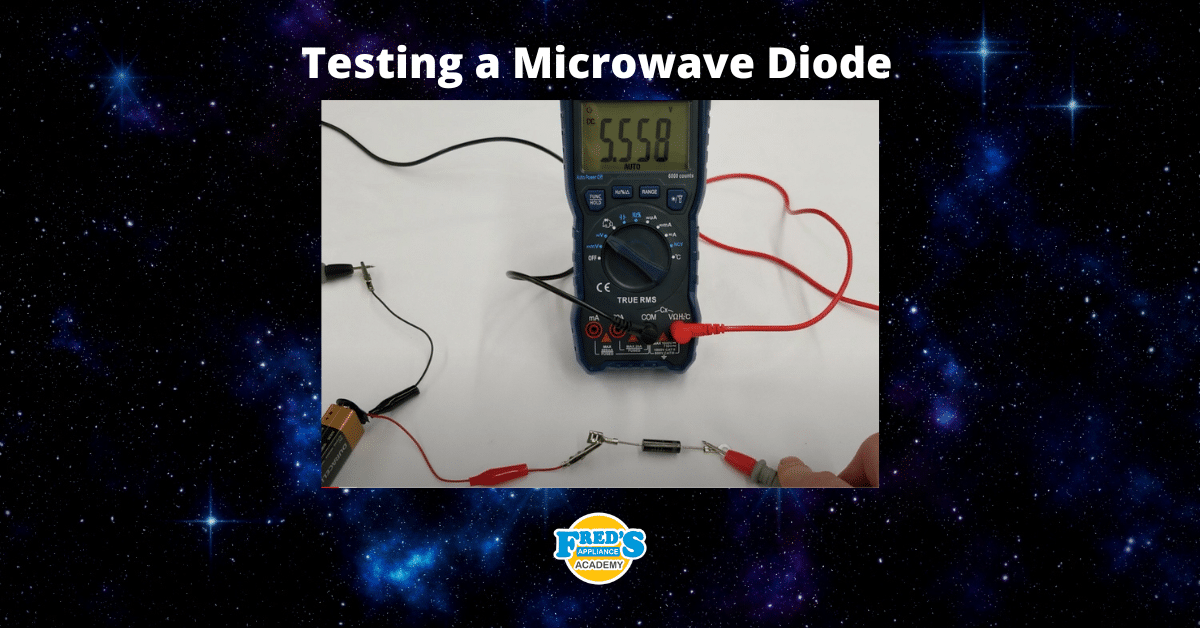
To complete this process you'll need your digital multimeter set to volts DC, a nine-volt battery with a full charge attached to a battery snap with alligator leads as well as your microwave diode.
To begin this process, take the negative side of the battery, which has a little alligator lead on it, and we're going to clip that onto the common wire on our multimeter. Next, we're going to take the positive side of the battery and clip it onto the anode or positive side of the diode.
Lastly, we'll connect the positive side of the multimeter to the cathode side of the diode and see about 5.5 volts flow through. That small amount of voltage drop is normal.
Now we're going to flip the diode around, connect the positive side of the battery to the cathode, and the anode side of the diode to the positive side of the meter, in which we should see no voltage flowing through the diode.
Voltage in one direction, but not the other, indicates that the diode is working properly.
Power can only flow through the diode from the anode to the cathode side, or positive to the negative side. If you were to find that voltage was flowing in both directions, that indicates that your diode has shorted.
If you were to find that there was no voltage flowing in either direction, that would indicate that your diode is open, meaning no current can flow at all.
An easy way to identify the cathode side of the diode is it is always the side with a little eyelet that attaches to the cabinet of the microwave, meaning the opposite side must be the anode side.
Join the industry's best trainers.

(800) 781-1814Text or ring! ring!
Live ChatClick to say hi

Apr. 29, 2024
Appliance Industry 2024 Q1 Results

Apr. 29, 2024
Congrats to our graduating April 2024 class

Apr. 05, 2024
How to test a gas range ignitor

Mar. 29, 2024
Congrats to our graduating March 2024 class

Mar. 22, 2024
How to test a 120 volt receptacle

Mar. 01, 2024
Congrats to our graduating February 2024 class

Feb. 05, 2024
Why Is Your Dishwasher Soap Not Dissolving? (5 Easy Fixes)

Feb. 05, 2024
Refrigerator Dripping Water Inside? 5 Quick Fixes

Feb. 02, 2024
Appliance Industry 2023 Q4 Results

Feb. 02, 2024