


Fred's Appliance Academy
June 30, 2020
Partner
If your GE Washer is making some less-than-pleasant noises that are cause for concern, you’ve come to the right place to troubleshoot it. This diagnostic guide and repair guide is ideal for the following GE models:
- GTW460
- GTW485
- GTW490
- GTW500
- GTW680
- GTW750
What sounds are normal?
If any of these above-mentioned models are new to you, you may not be certain what sounds are totally normal for a GE washer. There is a list of normal noises including the following:
- Humming, pulsing, or slight buzzing: this noise is similar to an electric can opener. While the GE washer agitates the laundry, it will spin in one direction, pause, then spin in the opposite direction. Any of these types of noises are totally expected and not cause for concern.
- An initial clicking sound: each of the models GTW460, GTW485, GTW490, GTW500, GTW680, and GTW750 have a locking system on the lid. To properly measure the load size initially, the GE washer spins up and allows the load to settle repeatedly, so you will hear the clicking sound several times initially as the load engages and disengages.
- Gurgling: As the GE washer drains out, the pump will make a gurgling sound, caused by the combination of air and water leaving the washer.
Rocking from uneven flooring
If you have severely unlevel flooring, this will cause your GE washer to not be able to level completely and may cause it to rock due to being off-balance during the spin cycle. Since your washer will spin up to 800 rotations per minute, it makes sense why a drumming sound would occur. This loud rocking sound can be repaired by leveling your washer.
How to level a washer
If your floor is only slightly unlevel, you may need to simply use anti-vibration pads to help with vibration. General Electric makes specific anti-vibration pads that slip over the leveling legs.
To place these on the washer, make sure the washer has been unplugged from electricity, and the lid has been lightly taped down. Electrical or painters tape is a great option for easy removal. Turn off the water supply to the washer, and unscrew both the hot water and cold water inlet hoses with a large pair of pliers, or you may be able to simply unscrew each manually. You may need a bucket since there will likely be a little bit of water in each hose. Next, using a wrench, pinch the hose clamp and slide it down the drain hose, removing the drain hose.
Tip the dishwasher on to its back, and securely slide on the anti-vibration pads, product #WX17X10001CA, to each of the legs.
Make sure that you have already unscrewed each of the leveling legs appropriately; most floors will only need you to level the washer with the installed legs, but in extremely uneven surfaces, may require leveling boards or shims to help aid in leveling. Simply untwist the legs until approximately even, tip the washing machine back up, and use a level (not the naked eye) to ensure it is level before making adjustments.
Metal clanking from damaged tub bearings
If your washer is making clanking sounds or metal-on-metal sounds, separate from rocking sounds, the tub bearings may have been damaged by water due to a bad seal. In this scenario, you’ll need to use part #WH2X1198 to replace the old bearings. This process is fairly time-consuming, and you’ll need an area large enough to place the various pieces of the washing machine.
Replacing tub bearings
Tools needed:
- Philips screwdriver
- Putty knife
- Magnetic screw catcher
- ¼ in nut driver
- 5/16 in nut driver
- 7/16th in socket
- Hammer
- Spanner wrench
- Zip ties
- ½ in ratchet
- Torque 20 driver
Start by unplugging the washer from the outlet, and turning off the water supply.
The tub bearing is located between the agitator and the transmission, so to repair your washer, you’ll need to take many of the pieces off. The following will explain the method in which you should do this.
Dismantling the GE washer
To begin the process, remove the top screws of the washer with a Philips head screwdriver, and swing the console forward to lie on the washing machine. From there, slide off the air hose on the very end. On the opposing side, disconnect the wiring harness. You’ll be able to quickly identify it with its bright orange and white wires. (Make sure your washer is unplugged from the outlet!) Go ahead and lay the console over the back of the washer.
Using a putty knife, pull open the entire front panel of the GE washer. It will be clipped into brackets on the bottom, so simply pull it up slightly. Next, use your screwdriver to release the screws holding down the lid of the washer, then slide it forward to remove completely.
On the back of the GE washer, use a ¼ inch nut driver to remove the 4 screws. On the front of the washer, you’ll see a metal plate near the top; use the driver again to remove the 5 screws. Slide the small sides off that were kept in place by the screws. Pull the water level switch hose down, and simply lay the wiring harness gently over the side of the washer, being careful not to pinch any of the wires.
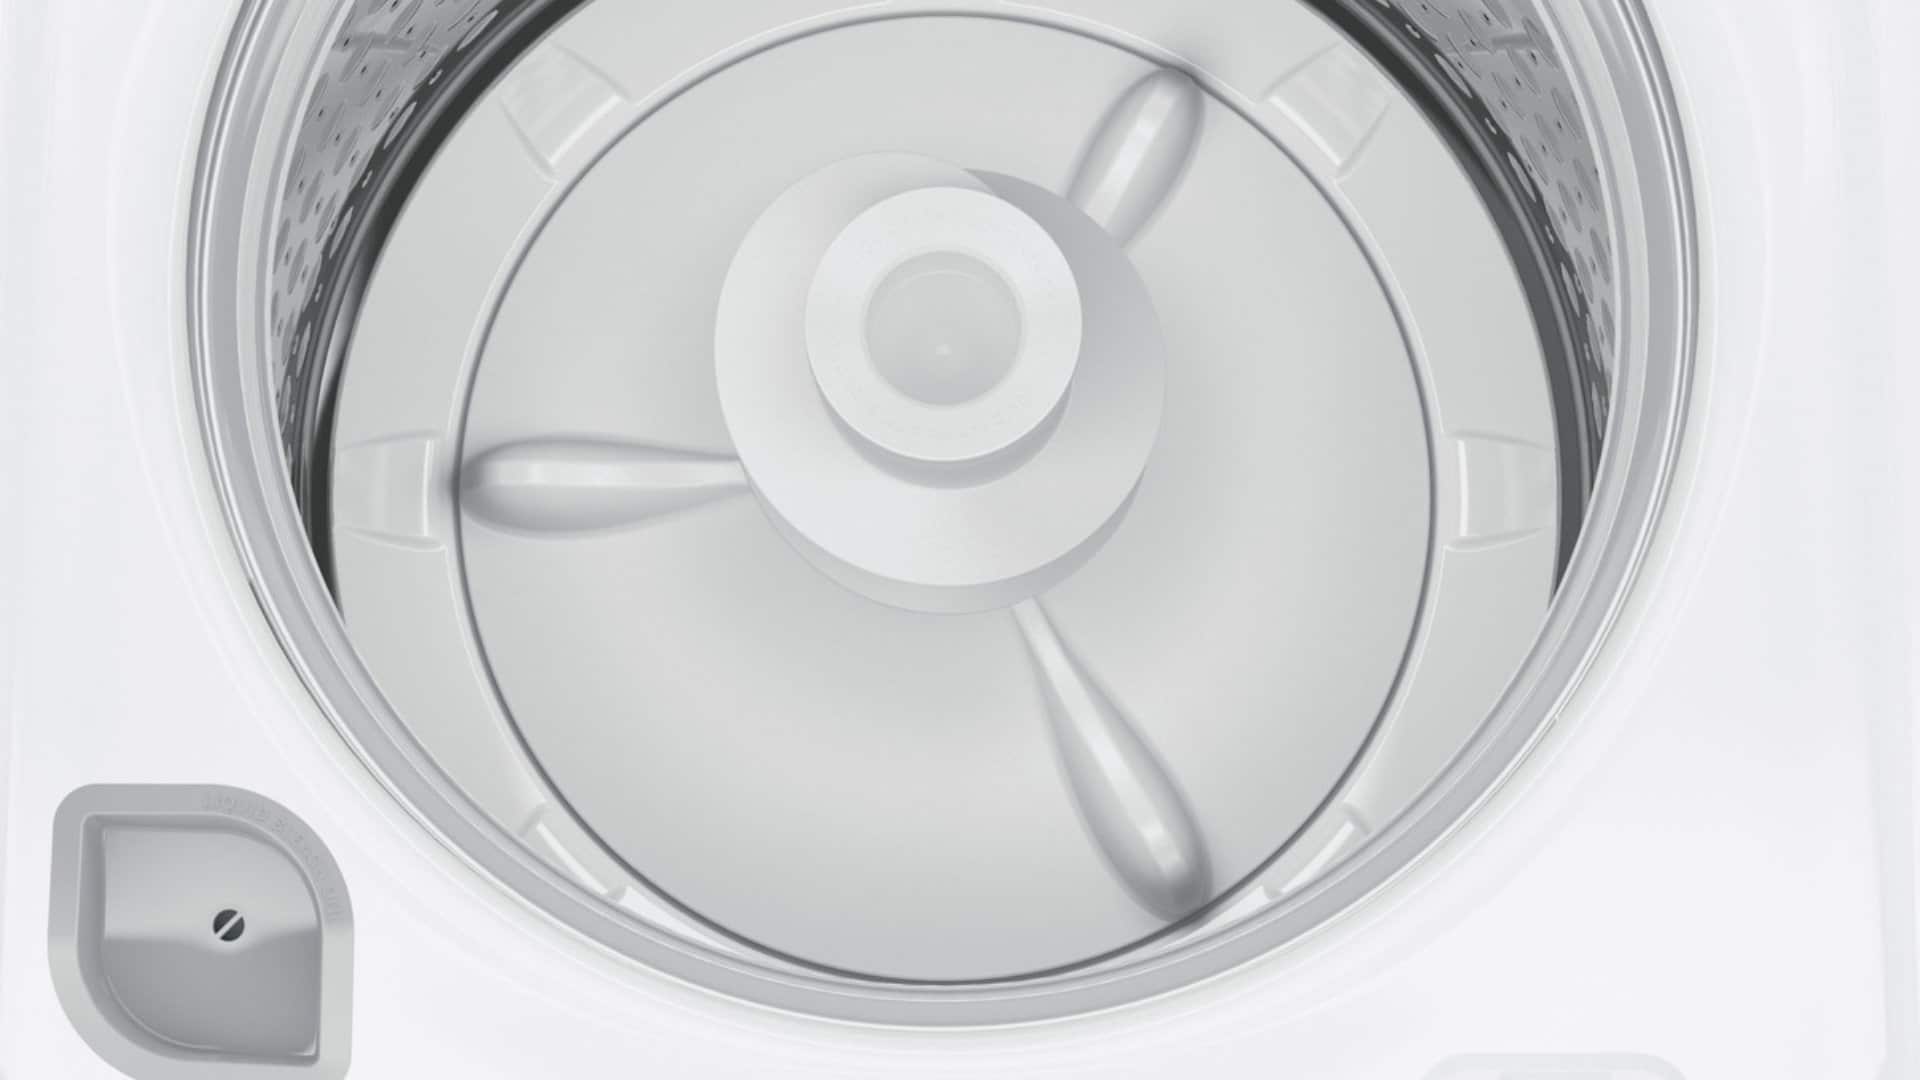
You can easily see the agitator now – the large piece in the center of your GE washer. Simply pull it up, and remove the 4 screws that keep the large tub in place. (You’ll need a 5/16th nut driver for this step.) Release the snaps that keep the drum in place, and lift the top of the drum off. Now, reach in with your 7/1th inch socket, and remove the agitator coupler.
Beneath the coupler is the hub nut. Slide the spanner wrench over the hub nut, and carefully hit the wrench with your hammer to loosen the nut. Once it is removed, you’ll want to lift the entire tub out of the machine.
Now, you’ll be able to see the split ring and washer. With a flat head screwdriver, leverage the split ring and remove it then rock the washer up. At this point, remove the air pressure hose from the side of the tub, as well as the grounding screw that you’ll see near the motor, at the base of the washer.
Unplug the motor, and with needlenose pliers, pull wire harness out and unwrap it from the suspension. Remove the drain hose from the bottom of the tub – be careful, since water may leak out.
There are 4 suspension rods, one in each corner, that support the washing tub. Simply lift the tub up slightly at each corner, and knock the suspension rods loose with a sturdy stick or long-handled tool. You can finally remove the outer tub! Lean it forward, and slide it out, and turn it upside down.
Accessing the tub bearing
The tub will have four ½ inch bolt to remove. Lift the entire assembly off of the tub, and set it aside. Don’t worry; you’re almost there!
Using the torque 20 driver, remove the screws keeping in the bearing that you will be replacing. Pry it up and out.
To put the bearing back in, slide it in, then lightly tap it into place. Place the torque 20 screw back in. After all that work, you’ve replaced the tub bearing, and your washer should no longer make loud, clanking noises as it runs.
Make sure when you are putting the transmission back in that you lower is slowly through the bearing so you don’t cause any issues with the bearing seal. From there, the process is exactly the same as taking it apart,
Simply repeat the process in the reverse, making certain to plug the washer back into the outlet, as well as turn on the water supply.
Tip: when working with screws, use a magnetic screw catcher to avoid misplacing any of the screws.
Join the industry's best trainers.

(800) 781-1814Text or ring! ring!
Live ChatClick to say hi

Apr. 29, 2024
Appliance Industry 2024 Q1 Results

Apr. 29, 2024
Congrats to our graduating April 2024 class

Apr. 05, 2024
How to test a gas range ignitor

Mar. 29, 2024
Congrats to our graduating March 2024 class

Mar. 22, 2024
How to test a 120 volt receptacle

Mar. 01, 2024
Congrats to our graduating February 2024 class

Feb. 05, 2024
Why Is Your Dishwasher Soap Not Dissolving? (5 Easy Fixes)

Feb. 05, 2024
Refrigerator Dripping Water Inside? 5 Quick Fixes

Feb. 02, 2024
Appliance Industry 2023 Q4 Results

Feb. 02, 2024