


Fred's Appliance Academy
June 6, 2022
Dryer Training
If your dryer is taking forever to dry, you’re in the right place. When this happens your dryer effectively becomes unusable as it isn’t able to do its job of drying your laundry properly.
In this article, we are going to discuss the four main reasons why your dryer takes forever to dry, including:
- The dryer might be overloaded
- The dryer isn’t on the right settings
- The dryer’s lint filter and vent might be clogged up, and
- The heating element in your dryer might be faulty.
Read through the article from start to finish and hopefully by the end of it you will have found the reason why your dryer isn’t working correctly and will be able to fix it.
1. The dryer is overloaded
The most common reason a dryer takes forever to dry is that the dryer gets overloaded with washing – especially heavy items like towels and sheets. If you’re only drying clothes you can usually fill your dryer up about three-quarters of the way full but if you’re drying towels and heavy sheets, try to keep it about half full at most. It’s a good idea to not put heavy items in with lighter ones as they take significantly longer to dry. If you can find your dryer’s user manual it will most likely have some instructions for how much washing to put into your dryer at any one time.
2. The dryer isn’t on the right settings
Another common reason why your dryer takes forever to dry is if you don’t have it on the correct settings. If you have an automatic dry option on your dryer, it’s recommended that you use that as it will automatically determine the correct temperature to use. If you don’t have that option on your dryer, make sure you use the hottest setting available if your laundry is quite damp.
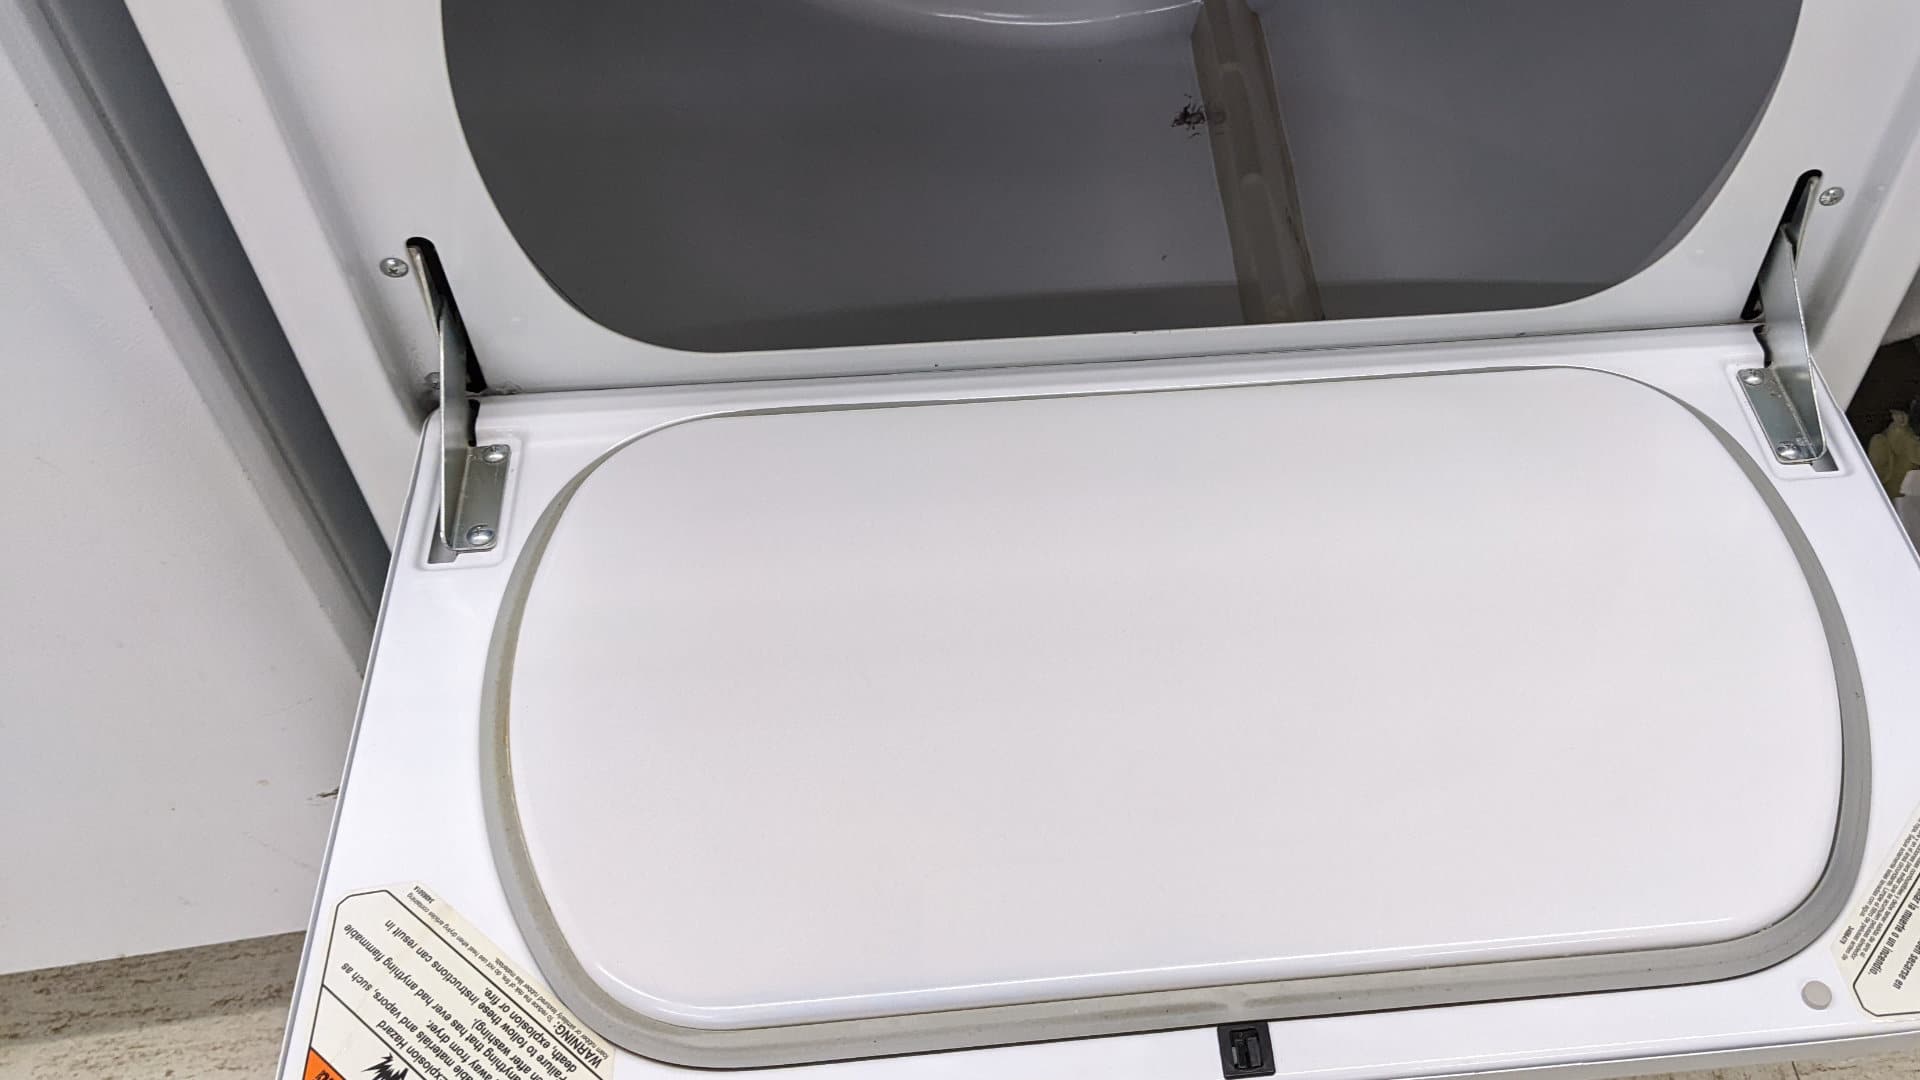
3. The dryer vent and lint filter are blocked
A dryer can stop working correctly if the dryer vent or lint filter are clogged up. When this happens, hot air cannot properly circulate through your dryer, meaning that your laundry will take much longer to dry, or not dry at all.
Checking, and if necessary, cleaning these components are simple. Here’s what to do:
- First, locate the lint filter and remove it from your dryer. You can usually find the filter at the back or in the front of the dryer drum.
- Once removed, discard all the lint from it. The easiest way to do this is to use a vacuum cleaner. Once clean, place it back into your dryer. To avoid your lint filter from becoming clogged up in the future it’s recommended that you clean it out every time you use your dryer.
- Once the filter is clean, locate the dryer vent at the back of the dryer
- Detach it from your dryer and then use a vacuum cleaner to clean all the lint out of it. You can then use a damp cloth to wipe up any remaining lint. If your vent goes out through the wall of your house, you can also clean it from that end with a vacuum cleaner
- Once the vent is clean, reattach it to the dryer
- Turn your dryer back on and check if the problem has been resolved. If not, check the heating element (see below).
4. The heating element is faulty
If one of the above reasons we outlined didn’t help you solve the problem, the final reason we want to highlight is that the heating element in your dryer may have become faulty. The heating element is responsible for generating heat which warms up the air that gets circulated through your dryer.
Checking the element requires a multimeter to test it for continuity. If you don’t have a multimeter, you should call a qualified technician to come and inspect your dryer. They will also be able to check out components like the thermostats.
If you have a multimeter, here’s how to check the heating element:
- Turn the power to your dryer off. You can simply unplug it from the power socket, or turn the circuit breaker off.
- Pull your dryer out from the wall so you can get easy access to the back of it
- Remove the top and side panels from your dryer. If you’re not sure how to do this, your user manual will have step-by-step instructions.
- Once the panels are removed, locate the heating element
- Disconnect the heating element and then test it with a multimeter for continuity
- If it passes the test, you can reattach it to your dryer. At this stage, you will need to call a qualified technician to come and inspect your dryer to find the cause of the problem.
- If the element fails the continuity test, replace it. Once replaced, check if your dryer is working correctly. If not, you will need to call a qualified technician to come and inspect your dryer to find the cause of the problem.
Join the industry's best trainers.

(800) 781-1814Text or ring! ring!
Live ChatClick to say hi

Apr. 05, 2024
How to test a gas range ignitor

Mar. 29, 2024
Congrats to our graduating March 2024 class

Mar. 22, 2024
How to test a 120 volt receptacle

Mar. 01, 2024
Congrats to our graduating February 2024 class

Feb. 05, 2024
Why Is Your Dishwasher Soap Not Dissolving? (5 Easy Fixes)

Feb. 05, 2024
Refrigerator Dripping Water Inside? 5 Quick Fixes

Feb. 02, 2024
Appliance Industry 2023 Q4 Results

Feb. 02, 2024
Congrats to our graduating January 2024 class
Jan. 26, 2024
Clever ways to use airbags to level your appliances
Jan. 12, 2024