


Fred's Appliance Academy
September 6, 2022
Dryer Training
Dryer vents are generally installed from your dryer to an external port like the outside of your home. They are an important part of any laundry setup but are often ignored until they become clogged up and your machine starts having issues or pumping out clothes that are still wet.
This could be a sign that your dryer vent is clogged up and needs to be cleaned. Thankfully you don’t need a handyman because you can just do it yourself. Just follow our easy five step guide to clean up your dryer vent and enjoy a hassle-free laundry day.
1. Access the Vent – Disconnect the Dryer
This is obviously the first step in any cleaning process where you have to take apart the thing that you are cleaning; in this case, it’s the dryer vent. Before you begin, ensure your dryer is disconnected from its power source. Look for any clips or screws that might hold down the housing from your dryer unit and unclip/unscrew them to detach the vent from your dryer. Always make sure that your dryer or any appliance has been disconnected from its power source before beginning to inspect its internals. You might get shocked, and you don’t want that to happen!
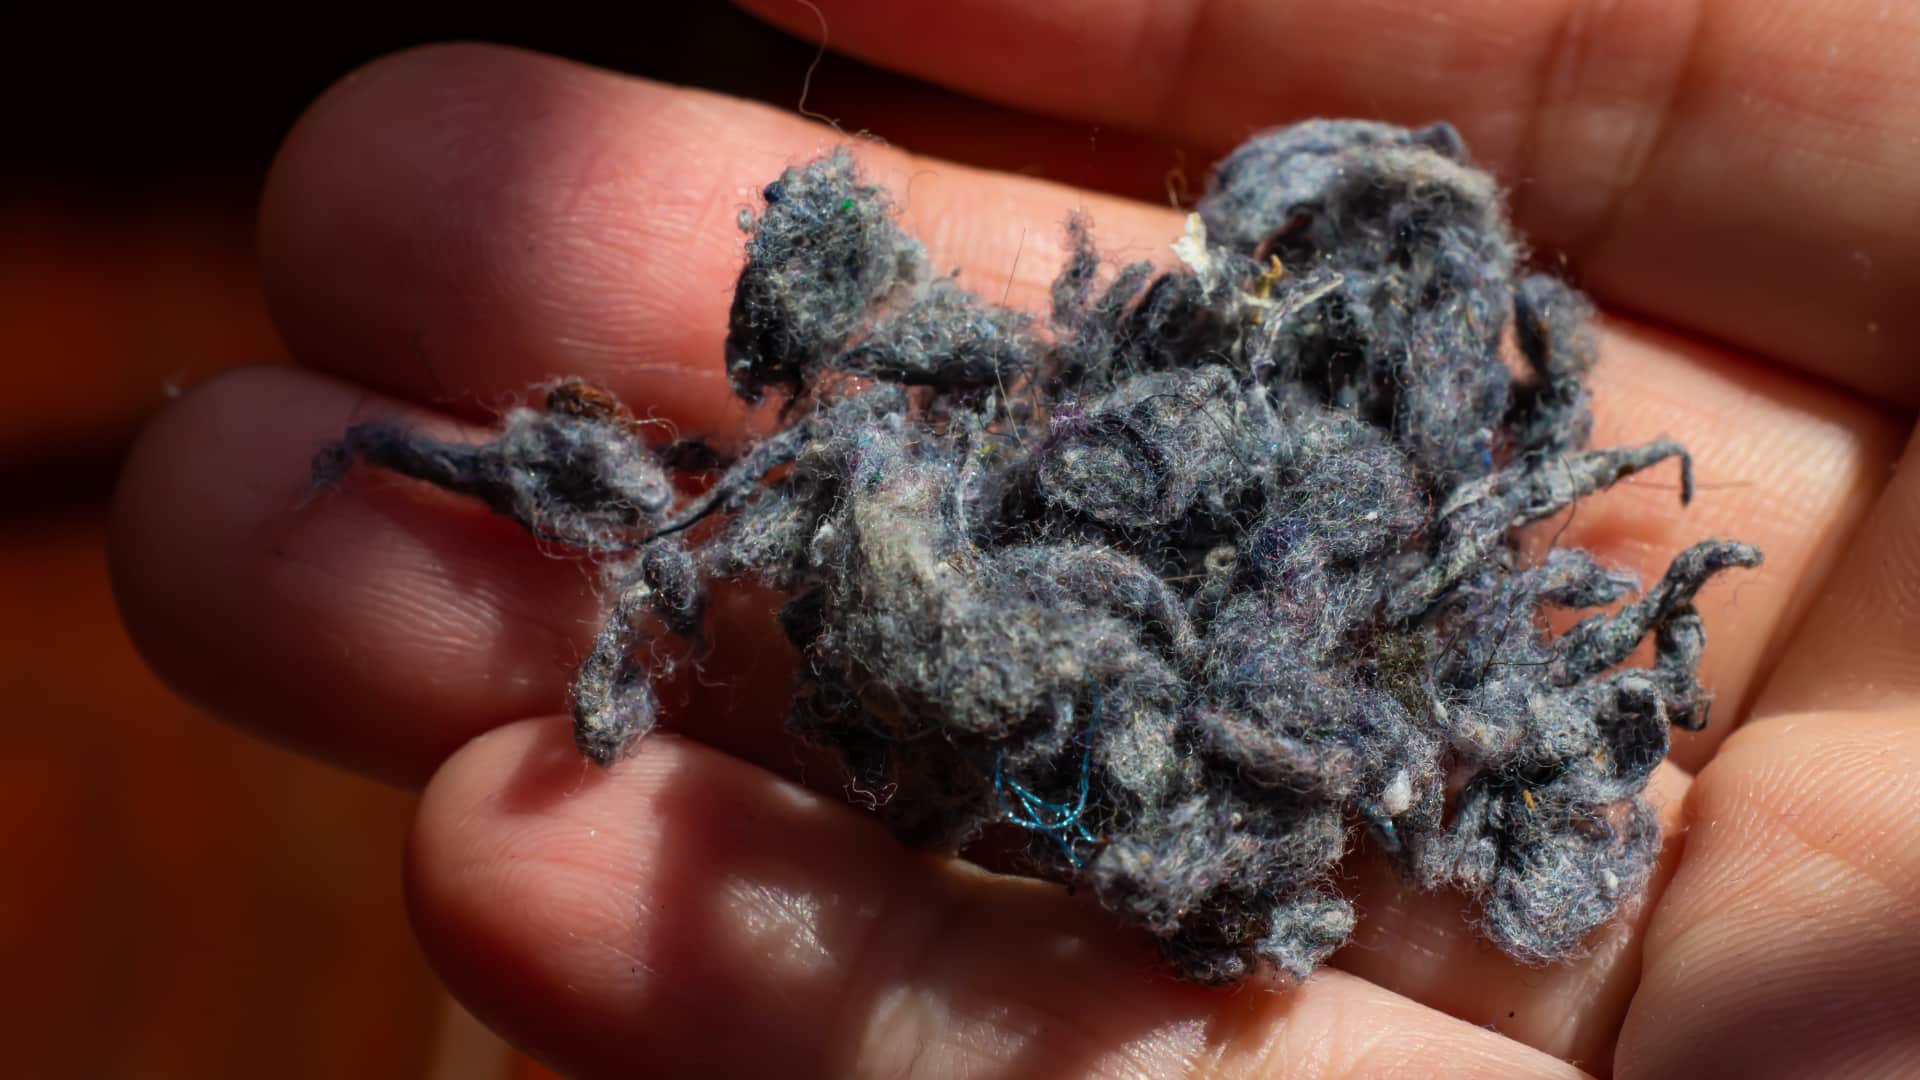
2. Clean up the exhaust
The exhaust which connects the housing to your dryer is often the spot that is covered or bogged down with excessive lint. When you have completed the first step, take a quick look at the filters and the unit itself for any dirt/sand or lint. If you find any, take a handy brush and reach in with a twisting motion and then pull the brush out gently. All of your lint that might be bogged will be captured by the brush. Use a vacuum to pick up the mess you created on the floor! Move on to the next step, as there are multiple other parts to a dryer vent that needs to be cleaned!
3. Brush and Vacuum the Duct & Pipe
Now, this step will require the most effort due to its strategic location going from the dryer unit inside the wall through to the outside of your home, and it is the place that will have the most debris in it. Disconnect the available end of your duct and place a bucket or something else underneath it so you won’t make a mess. Now, take a stretchable or twisty brush and start scrubbing the inside of your duct. Use an extension of your brush handle to reach into the pipe. The pipe leads the duct all the way to the exterior for expelling the air and lint with it, you need to clean it too!
Once you have finished scrubbing the interior walls of the duct and pipe with your brush, all your lint will come loose, and you need to vacuum it up. Take a vacuum rod extension or a flexible one and run it down the length of your duct, turn on the vacuum and start pulling it back with some back & forth jerky movements; this will ensure you capture all the lint and make the least mess.
4. Check the Exterior Vent
All vents lead to an outer exhaust opening, and to ensure that your brushing has not propelled the lint to the far end, you need to check the exterior opening as well. Make your way to the exterior vent and open up its grate (if it is grilled up, if not, you might expect some creepy crawlies in there). Take your flexible brush and scrub it down to the available length, and then use a vacuum to vacuum up all the loosened-up lint. This will ensure that your airflow has a clear path and your vacuum won’t bog next time you fill it up with wet laundry.
5. Reconnect Everything
Once you are done with the cleaning and vacuuming, it’s now time to clean up the mess and re-attach everything back in the right places. Start by connecting the duct and pipe back to the exhaust section of the dryer unit, and don’t forget to place the outer grill back in its original place. Next, reconnect the exhaust to the dryer unit and initiate a dry run and check for proper airflow. If everything flows nicely without spitting out too much debris, pat yourself on the back for a job well done! Put your clothes in the dryer unit next time, and have a good laundry day!
It’s always better to do these tasks on your own; you get to be more hands-on with tools and you can get expertise in another domain, standing you in good stead for your next DIY job. Most of the time, people get confused with the time-frames as to when they should clean their dryer vents. The best thing is to be on the lookout for signs:
- Excessive lint on clothing is a sign your vent is bogged up
- Minimal to no drying can also indicate that your airflow is obstructed, and this can be caused by an obstructed vent.
- Things are getting excessively hot! If this is the case, then you can also interpret that your vent is clogged up and needs a thorough cleaning
- Humidity might rise up, if you feel excessively humid during drying sessions, you might want to check your dryer vent!
Join the industry's best trainers.

(800) 781-1814Text or ring! ring!
Live ChatClick to say hi

Apr. 05, 2024
How to test a gas range ignitor

Mar. 29, 2024
Congrats to our graduating March 2024 class

Mar. 22, 2024
How to test a 120 volt receptacle

Mar. 01, 2024
Congrats to our graduating February 2024 class

Feb. 05, 2024
Why Is Your Dishwasher Soap Not Dissolving? (5 Easy Fixes)

Feb. 05, 2024
Refrigerator Dripping Water Inside? 5 Quick Fixes

Feb. 02, 2024
Appliance Industry 2023 Q4 Results

Feb. 02, 2024
Congrats to our graduating January 2024 class
Jan. 26, 2024
Clever ways to use airbags to level your appliances
Jan. 12, 2024